I can crochet sweaters, scarves, hats, socks, and blankets of all sizes and of course my favorite, granny squares but it didn’t start out that way! When I was a kid, my grandmother, my dad’s mom, Grandma Betty, taught me how to knit. I did it for a short time and completely lost interest in it. Flash forward to when I was seven months pregnant with my son and told I needed to go on bed rest. And not just the “laying on your back” kind, the bed rest “on one side” kind.
And one side only. My mom went to the craft store and was walking up and down the aisles texting me different ideas for things that I could do while laying on one side. Let’s be honest, scrapbooking is definitely not happening while laying on one side. And neither is paint-by-number and neither is cross stitching. But as my mom hit the yarn aisle she said what about knitting and I jumped at the idea! I figured I could definitely do this while laying on one side especially with my arms hanging over the couch or the bed or wherever they let me rest my body between trips to the bathroom.
It was difficult at first. But then I figured out the way to prop up pillows and maneuver myself so that I had the best positioning possible. And then I decided that crocheting might be easier and had my mom pick up a hook for me. And thanks to the miracle of modern science and YouTube I was able to teach myself some easy crochet stitches. I WAS HOOKED! (Ha ha, see what I did there?)
Since then I have been able to crochet sweaters, scarves, hats, socks, and blankets of all sizes and of course my favorite, granny squares! Those babies have been the highlight of making some really cute bags! Check these out. So very colorful and fun to make. They are quick and easy (obviously). Here are a few that I recently finished.
I don’t really have a crochet pattern for this one. I simply made 18 granny squares the size I wanted, 9 for one side and 9 for the other, and then I slip stitched the sides together inside out. I then turned the bag right side out and crochet slip stitched the handle to the top of the bag.
For the second one, I crocheted 11 granny hexagons to the size I wanted. And slip stitched them all together on the wrong side. Then I turned it right side out and made a strap.
I crocheted a chain the length I desired for the strap. I made two passes in black, then 4 passes in the colors I used in the hexagons and then two more rows of black. I attached the strap with a large plastic needle and some black yarn. I “sewed” the ends into the inside of the bag.


It’s time to crochet through the pain
6 months ago I had a serious knee surgery and was propped up, on my back this time, for several weeks, and knew I was going to need something to keep my mind and my leg distracted. It was easy! I grabbed my crochet hooks and some Incredible yarn I got on special at Michael’s Craft Store and got to squaring.
Because of an unfortunate genetic malady, I cannot tolerate opioids so I was basically taking glorified tylenol for the pain. YEAH right, that didn’t work. I literally began crocheting like my life depended on it.
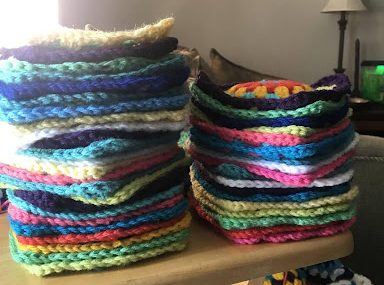
It was rapid. It was intense and for some unconscious reason I believed the faster I crocheted I might be able to crochet ahead of the pain. I didn’t realize this until I was through my 70th granny square for the week and had to laugh at myself for the ridiculousness of it. However whatever works, works. The first 2 weeks of my recovery I wound up making 142 granny squares in various colors and patterns.
Then I had to decide what to do with them. I had a friend who was going through chemotherapy and I posted a picture of a really cute crochet vest that I saw Jason Momoa wearing on the internet. I figured I can make that!. When I posted the picture she commented that she would have loved to have something like that as a blanket for her hospital visit. It was then I knew what all those granny squares were going to be when they grew up!
I started slip stitching together all my squares. Using black yarn and my crochet hook. It was quick and easy and I was very happy that I was making something so wonderful for someone else going through so much more than I was medically. It was fun and fast and it came out really nicely! I was over the moon happy when she came over and I got to give it to her. She LOVED it and was so happy that I made this for her. She took it to the rest of her chemo appointments and happily showed it off to people.


Every time I went to MD Anderson for my appointments I brought a GIANT bag of yarn with me and crocheted everywhere I went. Waiting for blood work one day the system went down and I had to sit there for over 45 minutes waiting for the system to reset. Those of you who have been to the phlebotomy department at MD Anderson know that it’s a large room with open cubicles and comfy recliners that you rest on while having your blood drawn.
So of course everyone who walked by or was sitting across from me was mesmerized by my work. Asking questions about my work. “How fast can I make them?” “What am I going to do with them? ” Overall they are most fascinated with the fact that I CAN do this. I tell them that they can too and encourage them to try. I have had people ask me to teach them, to send them videos etc…It’s very humbling and I love that people are getting inspiration from my passion.
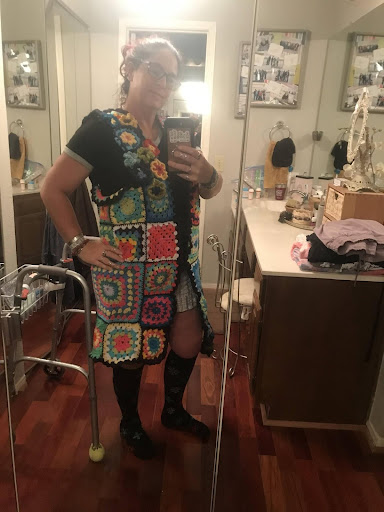
ANYWAYS…after making my friend’s blanket I still had so many squares left to work with! I loved Jason’s vest but I wanted something longer. So I began stitching all my leftover squares together.
I made a long back panel that was about 8 squares long and 4 squares wide. Using different sizes and patterns to create a patchwork piece. I made the front panels following the 8 squares long but made them two squares wide.
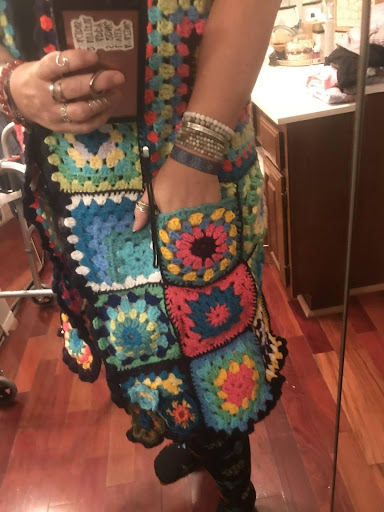
I attached them all together, wrong side out, with black yarn and my handy dandy plastic sewing needle. I then added a granny square on the outside of each front side panel to make pockets!!! I trimmed the entire outside edges making 5 triple stitches in each section of the squares. It made a kind of a ruffle effect and finished the piece nicely.
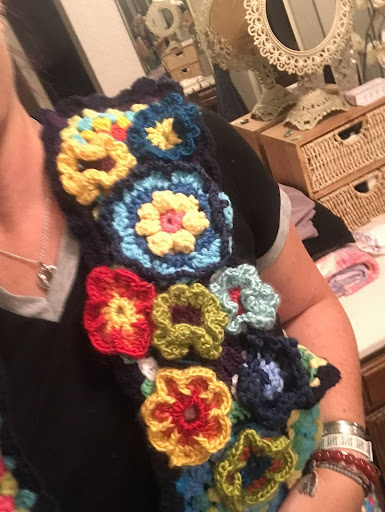
It’s amazing When I wear it I get called, “Mrs. Frizzle” . It’s thick and warm but good for winters in Texas which we all know barely exist. To make it even more “extra” I googled how to make some super pretty crochet flowers and embellished the top of one side of the vest. It’s SOOOO pretty!
