Check this out! If you are not sure how to or you don’t want to deal with the mess of “tie dye” the original way, this is a great alternative to it. Sharpie Tie Dye is Tie Dye with a twist! Ana has it down with this idea on her website. Here’s her “how to”!
Wearable Science & Art with Sharpie Tie Dye
Materials
- Sharpie Markers in Blue, Red, And Yellow I recommend using a light blue! The dark blue doesn’t mix as well with other colors.
- Plain White T-shirts or T- shirt fabric
- Large Embroidery Hoop (10-Inch)
- Eye Droppers
- Plate
- Small Bowl
- 70% Isopropyl Rubbing Alcohol
- Retayne (optional for making it colorfast)


Images taken from
Instructions
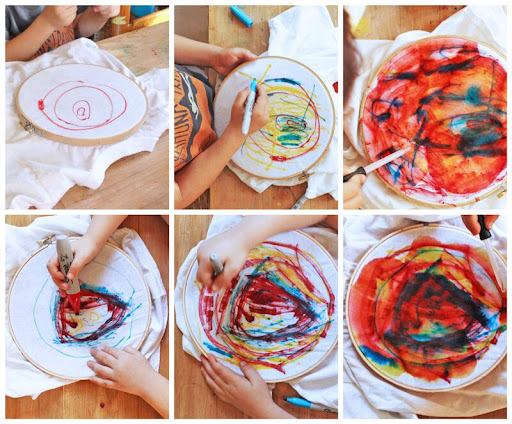
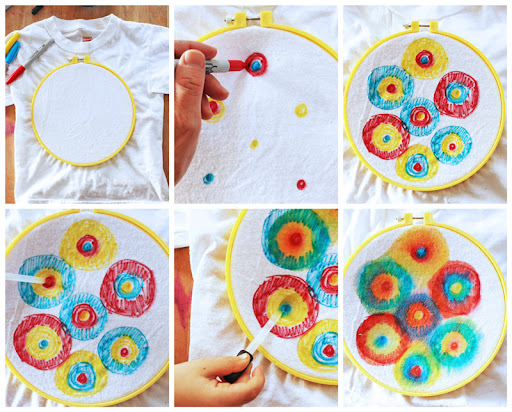
- Step One Use the embroidery hoop to tighten a section of fabric at the front of the shirt
- Step Two Use your red, yellow, and blue Sharpies to draw all over the shirt. Add a good layer of color. For the best color mixing demonstration you can use bull’s-eye designs with alternating red, yellow, and blue circles.
- Step Three When the design is complete, slip a plate inside the shirt under the embroidery hoop to catch any rubbing alcohol that may seep through.
- Step Four Pour rubbing alcohol into a small bowl. Using an eye dropper begin dropping rubbing alcohol on the t-shirt. If you have bull’s-eye designs drop the alcohol in the center of each bull’s-eye. Within seconds you will see more colors appear! Green, orange and purple should be visible as the ink bleeds and mixes with the other colors.
- Step Five Get that t-shirt really saturated! Alternatively use the rubbing alcohol in a controlled manner to bleed and blend only certain parts of the shirt. Now let dry.
- Step Six Once it’s dry remove the embroidery hoop and iron your shirt.
You’re done! Wear it!
Tips
- This will bleed and fade with washing if not treated! I recommend this product to help the dye fix to the shirt: Retayne
- For the science angle try and stick with just red, yellow, and blue colors, I know it’s so tempting to use other colors but the experiment is so clear when you limit yourself to the three primary colors and wait to see the secondary colors magically appear!
- I recommend using knits (T-shirt fabric) for this experiment. We tried it with plain white fabric and it will still work but the colors tend to look faded. Knit fabric absorbs and holds the color well.
- If you don’t have blank T-shirts but want to try this, cut up an old plain white T-shirt and stretch it over a hoop.
- No embroidery hoop? You can always stretch the fabric over cups and/or Tupperware and secure it with rubber bands.
Looks Like
Victor Moscoso. Victor Moscoso is one of the most famous psychedelic poster artists from the 60’s-70’s. I have a special place in my heart for psychedelic art since when I was a teenager I went through a hippie phase and couldn’t get enough of all things 60s. The bright colors and warped designs of the popular posters are so unique. Check out a few of Moscoso’s most famous posters here.
You might not be able to fully explain Psychedelic Art to your kids without an explanation of the substances used to “inspire” it but you can show them images of these wonderful posters and talk about optics and optical illusions.
Conclusion
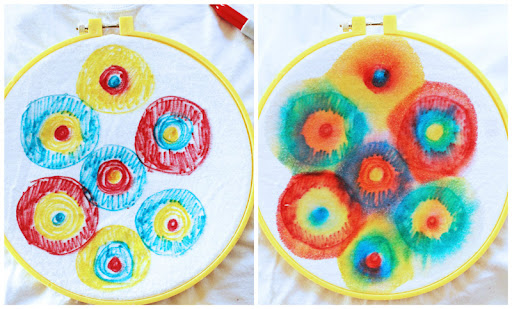
I’m a bit obsessed with color mixing experiments in general and Sharpie Tie Dying is another project I can happily add to the fun list of exploring color science. I can’t get over the before and after shots! Not to mention they just create vibrant and beautiful designs.

Another very cool technique that is on the same site uses ONE color and some alcohol. Check it out…Chromatography for kids sounds intimidating doesn’t it? It shouldn’t though, simply put, chromatography is the process of separating mixtures. That’s it!
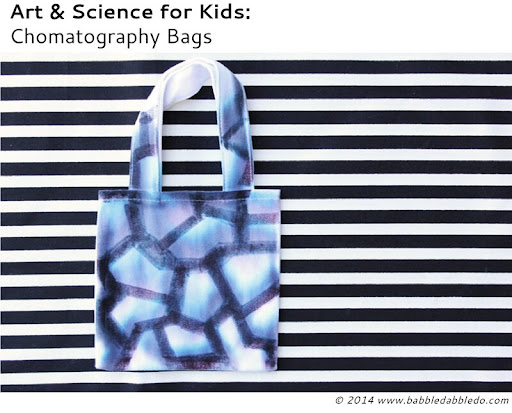
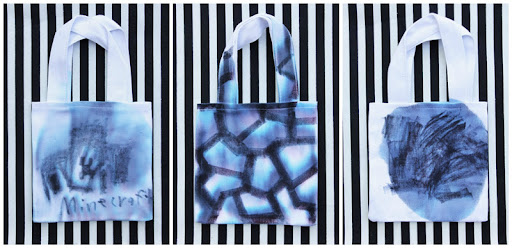
In today’s art project/easy science experiment for kids we are going to prove that black isn’t always black….and you can actually see the colors in black by separating them out using chromatography. This project is based on the well known black marker and coffee filter experiment for kids, but because I love a good cross disciplinary project we expanded the idea to make a fashion statement as well: Chromatography Bags!
Materials
- White Canvas Tote Bags These can be found at Michaels and Jo-Ann Fabric as well.
- Black Water Based Markers
- Rubbing Alcohol
- Pipettes
- Small cup
- Tray or plate
Instructions
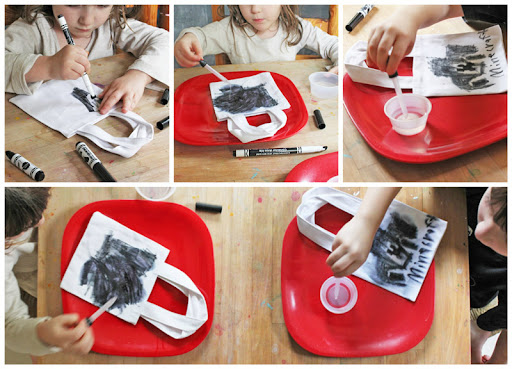
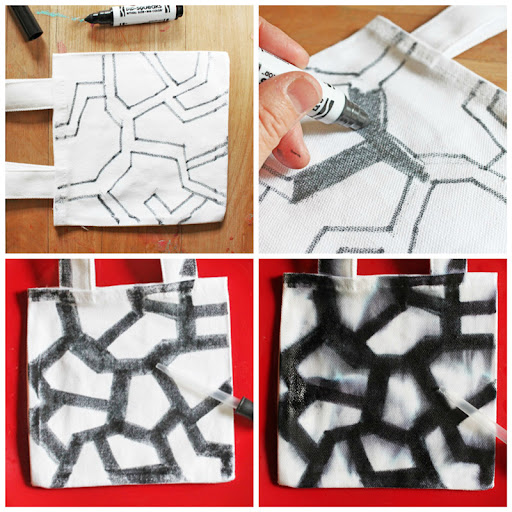
- Step One: Using a black marker ask your child to draw a picture or design on their blank bag. Designs that alternate a thick coat of black marker and white space in between will show the most obvious results.
- Step Two: Place the bag on a plate.
- Step Three: Give your child an eyedropper and a small cup of rubbing alcohol and ask them to start dropping the liquid on the drawing. Get that bag really soaked!
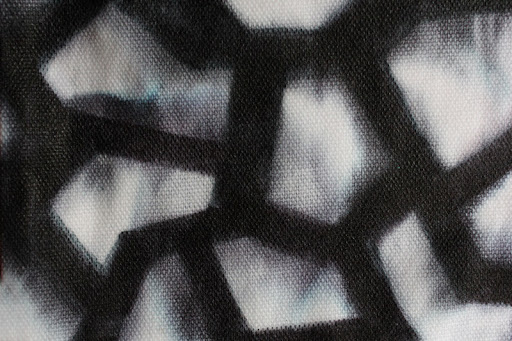
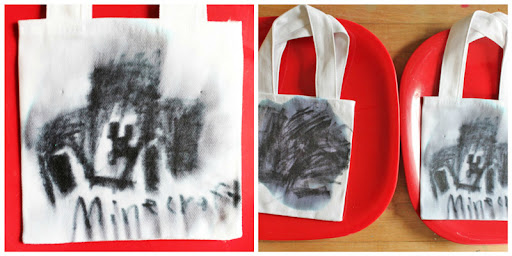
- Step Four: Some color will begin separating immediately. Allow the bags to dry over the course of several hours or overnight. The color will continue to separate.
- Step Five: Check on the color! The black should have separated into other colors. We had a lot of blue show up and a hint of brown/red.
You’re done! Tote ‘em around and show off the science experiment!
Tips
- DO NOT USE PERMANENT MARKERS! They won’t work.
- Since we used washable markers I do not suggest washing these.
- This experiment can also be performed using white coffee filters or paper towels in lieu of the bags. If you choose to do the experiment with coffee filters use water in lieu of the rubbing alcohol.
- We tried substituting water for rubbing alcohol with the canvas bags but the results were less than spectacular.
Looks Like
Keith Haring. The “graffiti” look of this project reminded me of the work of Keith Haring, a very popular artist from the 1980’s whose work crossed the line between street art, fine art, and in my humble opinion, graphic design. His images are immediately recognizable to many of us and I have always loved the simplicity and straightforwardness of his work. When I lived in New York his art seemed to be everywhere, and his influence can be seen on a new generation of artists like Shepard Fairey, whose work blurs the line between graffiti, artistic expression, and social activism.
Conclusion & More
Science and art are at again with this easy project that explores chromatography for kids! As usual my kids were skeptical about doing this project (they get that skepticism from me) but were excited to see the results of the experiment. And my daughter couldn’t wait to get her hands on the bags when they were done, she LOVES putting things in bags and carrying them around. Anyhoo this was a fun little design project for mom too!
- If you enjoyed seeing what happens when science and art meet check out our Glitter Tube Bracelets or one of my all time favorites here on Babble Dabble Do: Salt Pendulums.
- If you are fascinated by chromatography for kids try the experiment with paper towels or coffee filters. I love this version by Tinkerlab: Are Black Markers Really Black?
The Exploratorium also has a great set of instructions as well as an explanation of chromatography: Secret Colors in a Black Marker
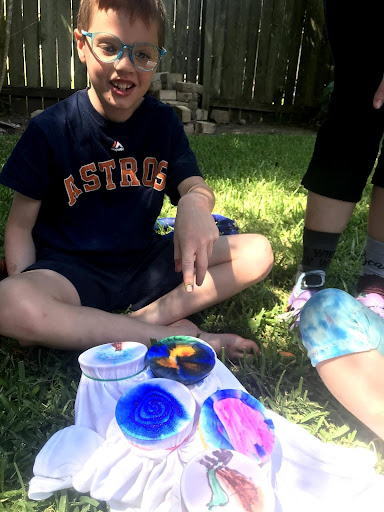
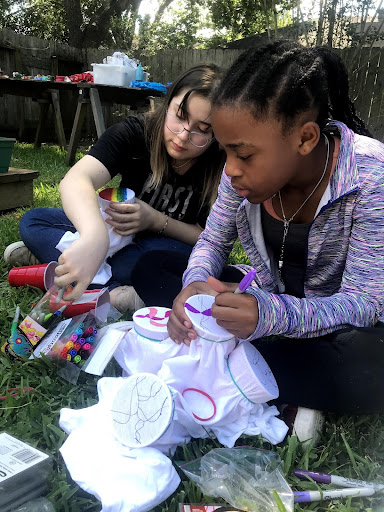
We do this art at my camps and the kids love it!. They love having more control of the colors and what the images turned out to look like.
We took red solo cups (instead of embroidery hoops) and some rubber bands. Place the cups INSIDE the shirt in a row or at random places. Place the rubber bands around the mouth of the cups so they create tension across the shirt.
Then color your images with sharpies or another permanent marker brand on the shirt inside the cups center. You can use a ton of cups or move them around as needed. Once you are done drawing, put some rubbing alcohol into a squirt gun and spray the sharpie pics. The ink will bleed around the cup and it looks like tie dye! It’s very cool.
One of my campers did a cool fire and ice theme. She did all the elements, one in each cup. Check these pics out. Some just did some free drawing, others made animals, bugs and shapes. It really was a free for all. Get creative and see what comes out of your sharpie art experiment.

")
")
")
")