If you have ever traveled to another state or country there is always a snow globe in the gift shop at the airport. Headed to any tourist spots in NYC or other major cool places like NASA or fun spots and there is a snow globe on the shelves. For a brief time I had a collection of snow globes that lived on some shelves in my room growing up. They were typically from places my family or friends or myself had visited around the world.
I always stared at it in fascination and wondered about its inner workings and what kind of liquid made the confetti and glitter dance like that . Now, as an adult, and through the beauty of google and Pinterest we can make our own easily!
Let’s discuss snow globes. On the website artsy.net they have a great article about the background of snow globes.
“The snow globe: an emblem of winter, a cherished childhood trinket, a gift-shop staple. It’s an object that simultaneously evokes holiday cheer and, for some, eye-roll-worthy kitsch. Snow globes are irresistible for their promise of brief, easy entertainment—plus the added visual delight of the whimsical miniatures found inside. Yet despite their ubiquity, most of us don’t know where snow globes come from. Indeed, the early years are rather fuzzy—but it is clear that the snow globe traces back to Europe near the end of the 19th century. The oldest known description of a snow globe–like object comes from an 1880 U.S. Commissioners report on the 1878 Paris Universal Exposition, where a local glassware company showcased a group of “paper weights of hollow balls filled with water, containing a man with an umbrella.”
The objects also contained white powder that fell “in imitation of a snow storm” when turned upside down. Such glass-domed paperweights were popular in the late 1800s, but this appears to be the first to include such a playful feature—and it seems to have been the world’s first snow globe.
However, it was an Austrian man named Erwin Perzy who is widely considered to be its proper “inventor,” albeit accidentally. In 1900, while living outside Vienna, where he ran a medical instrument–supply business, Perzy was asked by a local surgeon to improve upon Thomas Edison’s then-new lightbulb, which the surgeon wanted made brighter for his operating room.
Drawing upon a method used by shoemakers to make quasi-“spotlights,” Perzy placed a water-filled glass globe in front of a candle, which increased the light’s magnification, and sprinkled tiny bits of reflective glitter into the globe to help brighten it.
But the glitter sank too quickly, so Perzy tried semolina flakes (commonly found in baby food) instead. They didn’t quite work, either, but the appearance of the small, white particles drifting around the globe reminded Perzy of snowfall—and he quickly filed the first official patent for a snow globe, or Schneekugel.


By 1905, he was churning out dozens of handmade snow globes—often featuring small church figurines made from pewter—through his company, Firm Perzy.
They became so popular among well-to-do Austrians that in 1908, Perzy was officially honored for his treasured item by Emperor Franz Joseph I.
So now that we know the initial workings of the snow globe, let’s make one ourselves! Here are the materials you will need to collect before you get started…
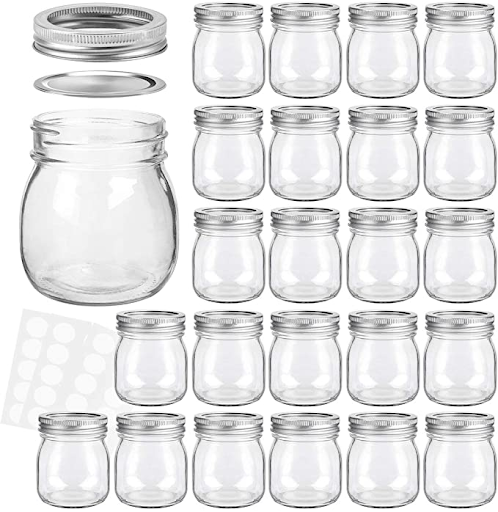
- Mason jar or any other container with a locking lid
- snowman figure or other figures you prefer
- baby oil
- white paint
- water
- glitter / snowflakes / other confetti shapes
- hot glue gun
Step One
Glue the plastic figure (snowman or other object is fine) to the bottom of the lid. (If you’re using a mason jar where the lid and the ring are separate you will want to glue those pieces together when you add the figure to the lid.
Be careful with the hot glue gun.
Kids; please ask for grown up help. Or you can purchase a low temp glue gun that is safe for everyone’s fingers. You can also add some glitter to the hot glue as it is drying.
Or they sell hot glue sticks in colors now! You could even get creative with the colors you use that will show up in the snow globe.
Step Two
Fill the entire mason jar with baby oil, all the way up to the top ring. Stop there!
Step Three
Now add the fun stuff! Confetti snowflakes and glitter! Don’t over glitter this jar. I am REALLY bad about over glittering things. I can’t help myself! A pinch for a small jar or two pinches are all you need. I keep thinking of the commercial that says “A little dab will do you”.
Step Four
In a mixing bowl or something like that you need to mix 1 cup of water with 1 teaspoon of white acrylic paint and stir until it’s all mixed together. Mix it up really good because undiluted paint may stick to the insides of the globe.


Step Five
Go ahead and pour the water and paint mixture into the snow globe. Pour it as close to the top of the jar as you can, trying to leave only a few mms of space. This will keep away air pockets at the top. (there may be leftover paint you can just toss)
Step Six
Carefully put the lid on the globe and make sure you screw it closed very well.
Step Seven
If you want to seal the lid to the jar. (which I GREATLY recommend)I recommend using an adhesive called E6000. Here’s the link on amazon, but you can get it at most craft stores.
You can squeeze it out all around the inside of the lid and then screw it shut. Be careful not to get any of the baby oil/water paint mixture in the glue when you close the lid.
Get creative! Maybe make different snow globes for the different seasons of the year.
Maybe make globes for all your friends for the holidays. Your kid could make snow globes as party favors for a birthday party!
Maybe the theme is superheroes and each snow globe has a different plastic superhero figure glued inside. The sky is really the limit here! Just remember to only use a pinch of glitter.

